Build 3D Worlds with MagicaVoxel
A free, GPU-powered voxel editor and path tracing renderer. Create detailed 3D models, scenes, and animations block by block with professional rendering built in.
System Requirements
MagicaVoxel runs well on modest hardware. A GPU with OpenGL 3.3 support is the main requirement for both the editor and the path tracing renderer.
| Component | Minimum | Recommended |
|---|---|---|
| Operating System | Windows 7 SP1 (64-bit) or macOS 10.12 Sierra | Windows 10/11 (64-bit) or macOS 12 Monterey+ |
| Processor (CPU) | Intel Core i3 or AMD equivalent (dual-core) | Intel Core i5 / AMD Ryzen 5 or better (quad-core) |
| RAM | 4 GB | 8 GB or more |
| Disk Space | 100 MB (portable install, no setup required) | 500 MB (including saved projects and palettes) |
| GPU (Graphics Card) | Any GPU with OpenGL 3.3 support (Intel HD 4000+) | Dedicated GPU with OpenGL 4.5 (NVIDIA GTX 960 / AMD RX 560 or newer) |
| Display | 1280 x 720 (HD) | 1920 x 1080 (Full HD) or higher |
| Internet | Not required — MagicaVoxel works fully offline | Needed only for downloading the application |
Not sure if your PC can run it? MagicaVoxel is under 15 MB — download it and try.
What Is MagicaVoxel?
A lightweight voxel art editor with a built-in path tracing renderer, used by thousands of artists, game developers, and hobbyists worldwide.
3D art, one block at a time
MagicaVoxel is a free voxel modeling tool that lets you build 3D models, characters, and environments by placing small cubes (voxels) on a grid. Think of it as 3D pixel art. The editor runs on both Windows and macOS, weighs under 20 MB compressed, and needs no installation — just unzip and run.
Created by independent developer Ephtracy, MagicaVoxel has grown from a personal project into one of the most popular voxel editors available. The software combines a Model Editor for sculpting individual objects with a World Editor for arranging multiple models into full scenes. Artists use it for game prototyping, architectural concept work, NFT art, and just plain creative fun.
Rendering that punches above its weight
What sets MagicaVoxel apart from other voxel editors is its built-in GPU-accelerated path tracing renderer. Without leaving the application, you can produce images with realistic soft shadows, global illumination, depth of field, and atmospheric fog. The material system supports glass, metal, emission, cloud, and other surface types — so a simple voxel scene can look remarkably photographic once you press render.
The renderer uses your graphics card (OpenGL 3.3+), which means even a mid-range laptop GPU can handle it. Render times for a typical scene range from a few seconds to under a minute, depending on resolution and sample count.
Who uses it?
MagicaVoxel has a broad audience. Game developers use it to build low-poly assets and isometric environments. Digital artists create stylized illustrations and dioramas. Beginners pick it up quickly because the block-based workflow has a short learning curve compared to polygon-based 3D software like Blender. The r/MagicaVoxel subreddit and active Discord community share daily art, tutorials, and custom shader packs.
The current version (0.99.7.2 for Windows) added animation support, letting you create frame-by-frame voxel animations directly inside the editor. Models export to OBJ, PLY, and other formats compatible with Unity, Unreal Engine, and most 3D pipelines.
MagicaVoxel in Action
See the voxel editor, path tracing renderer, and finished artwork created by the MagicaVoxel community.
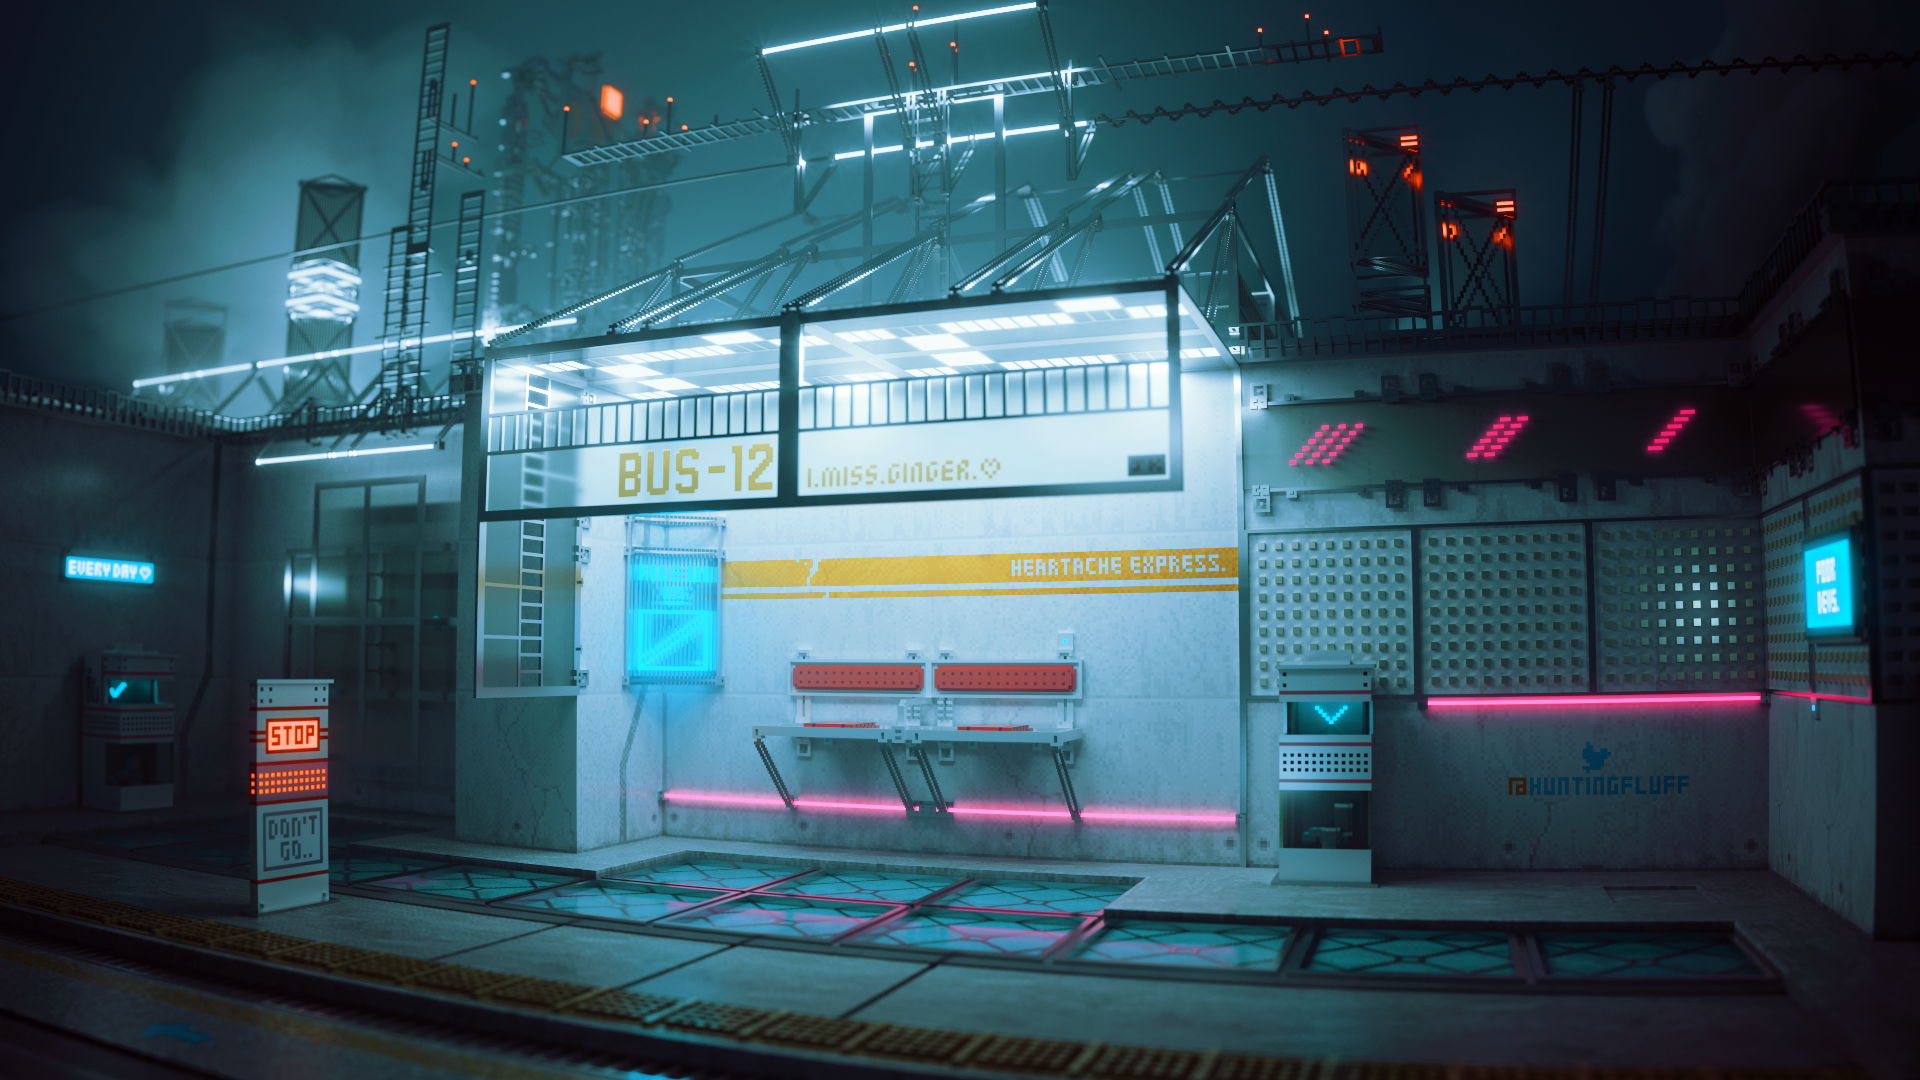
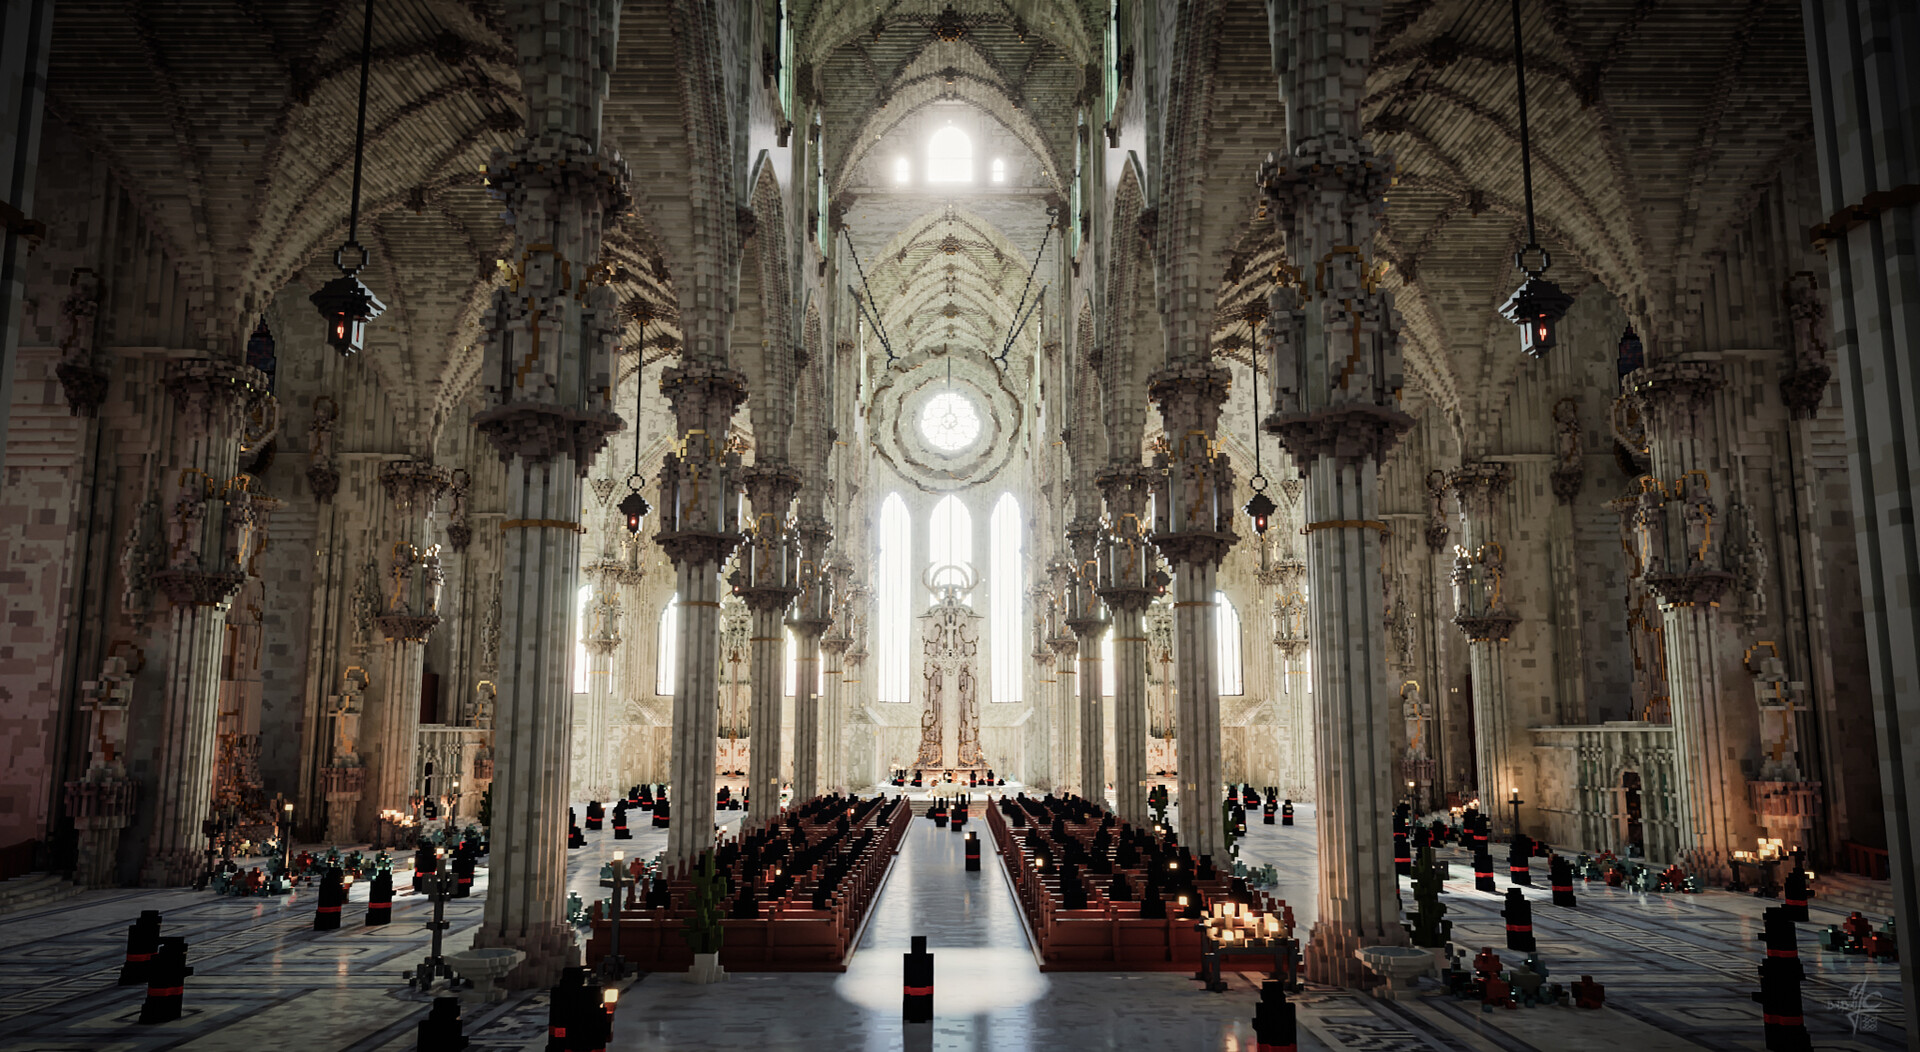
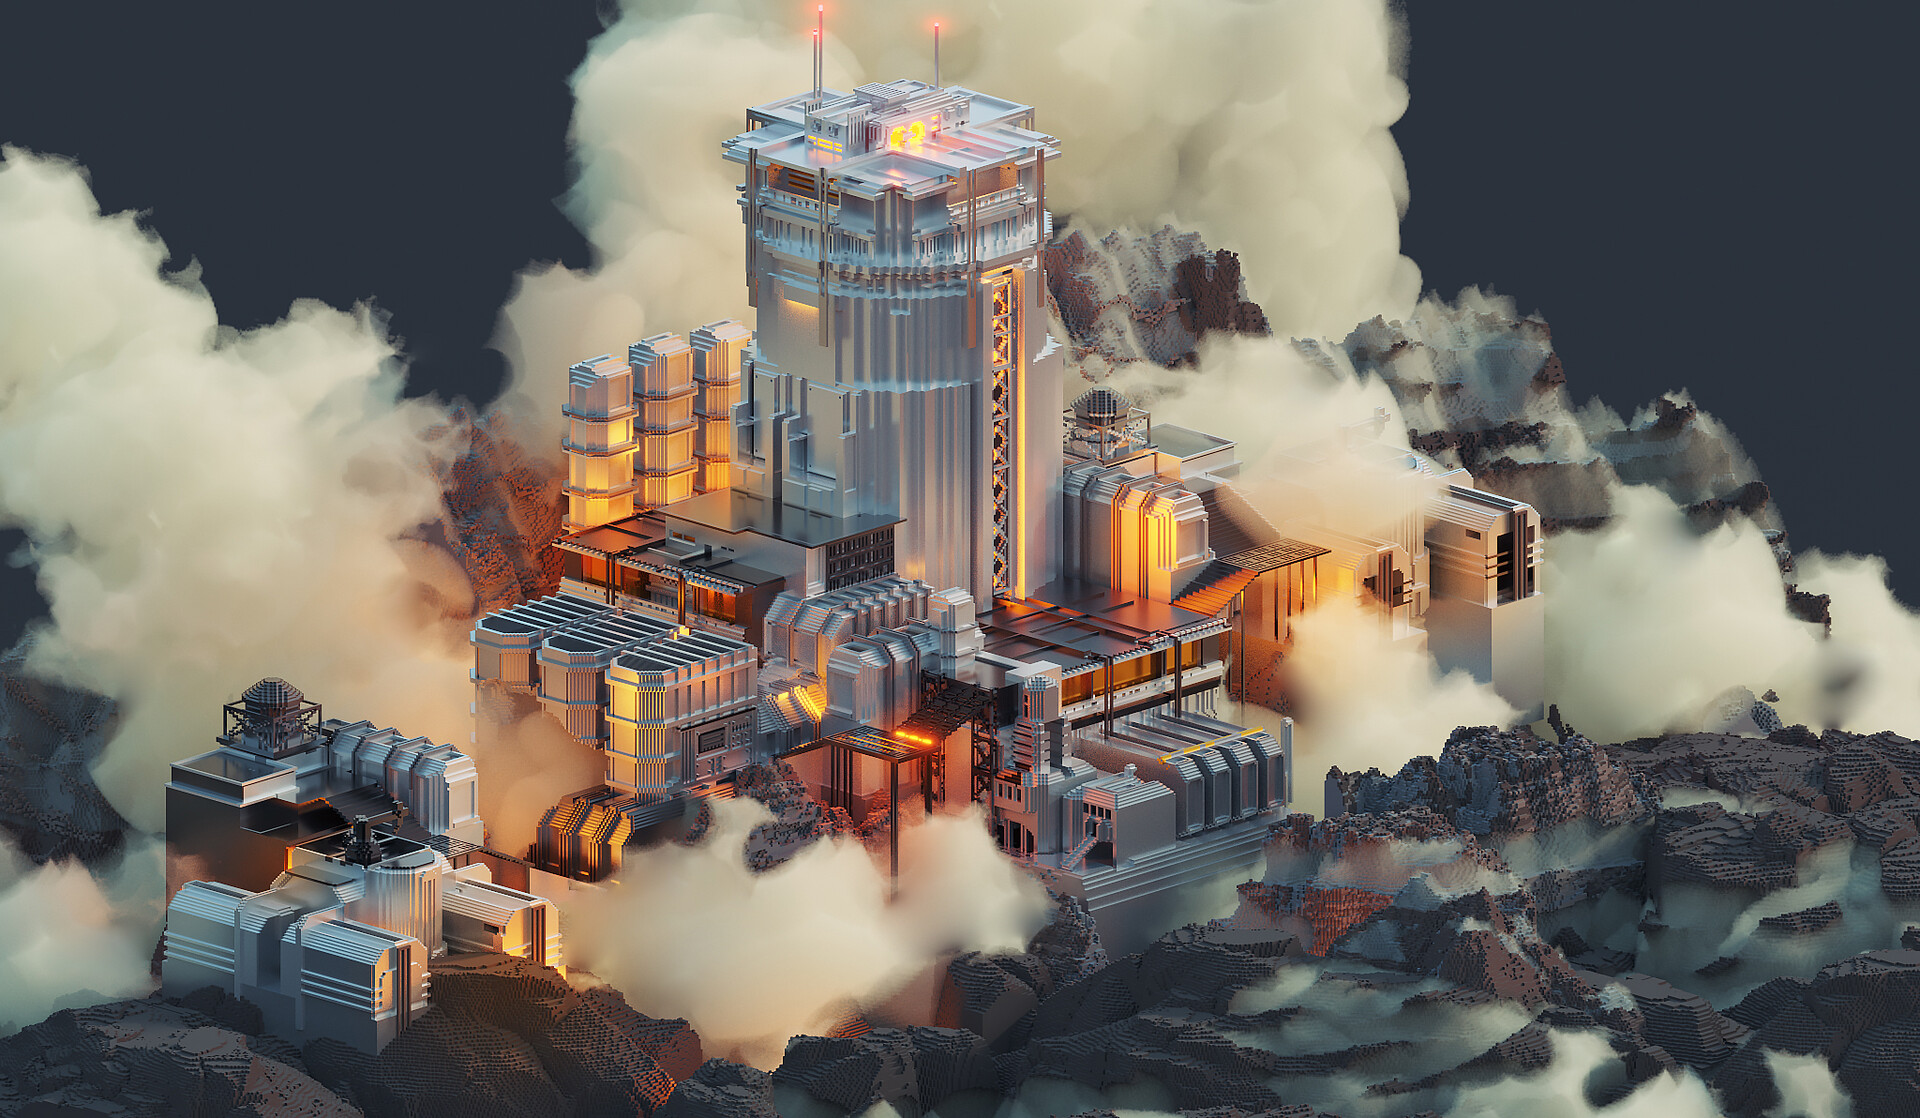

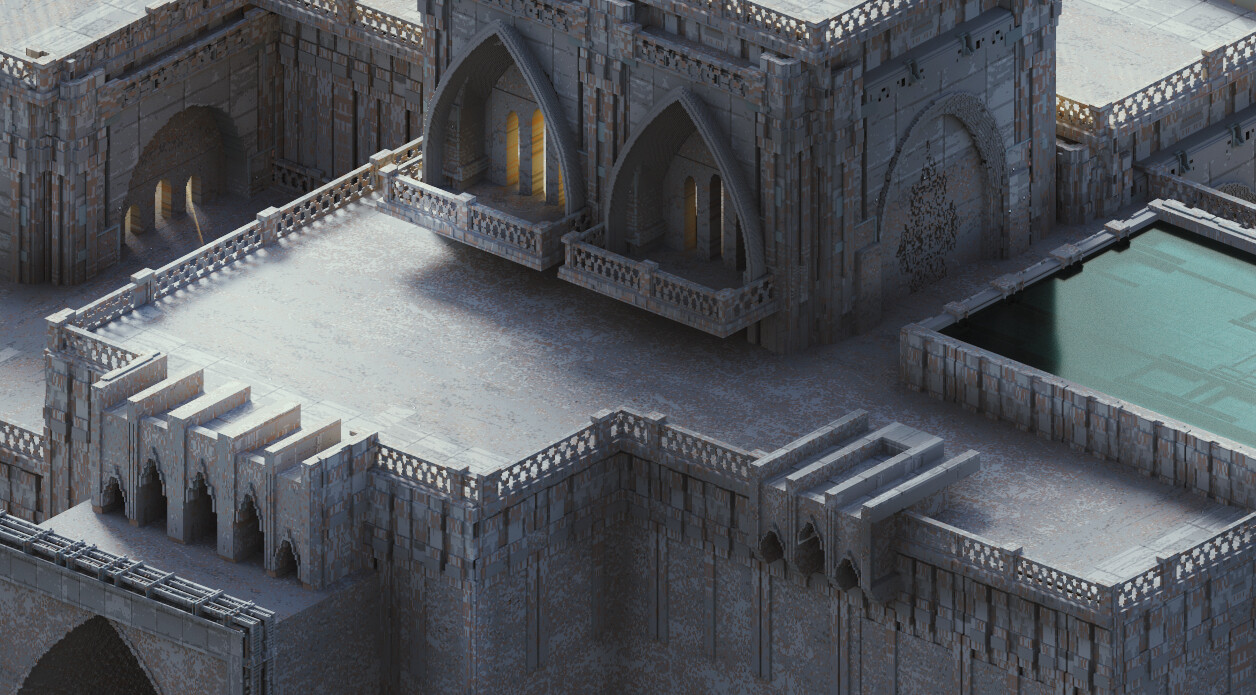
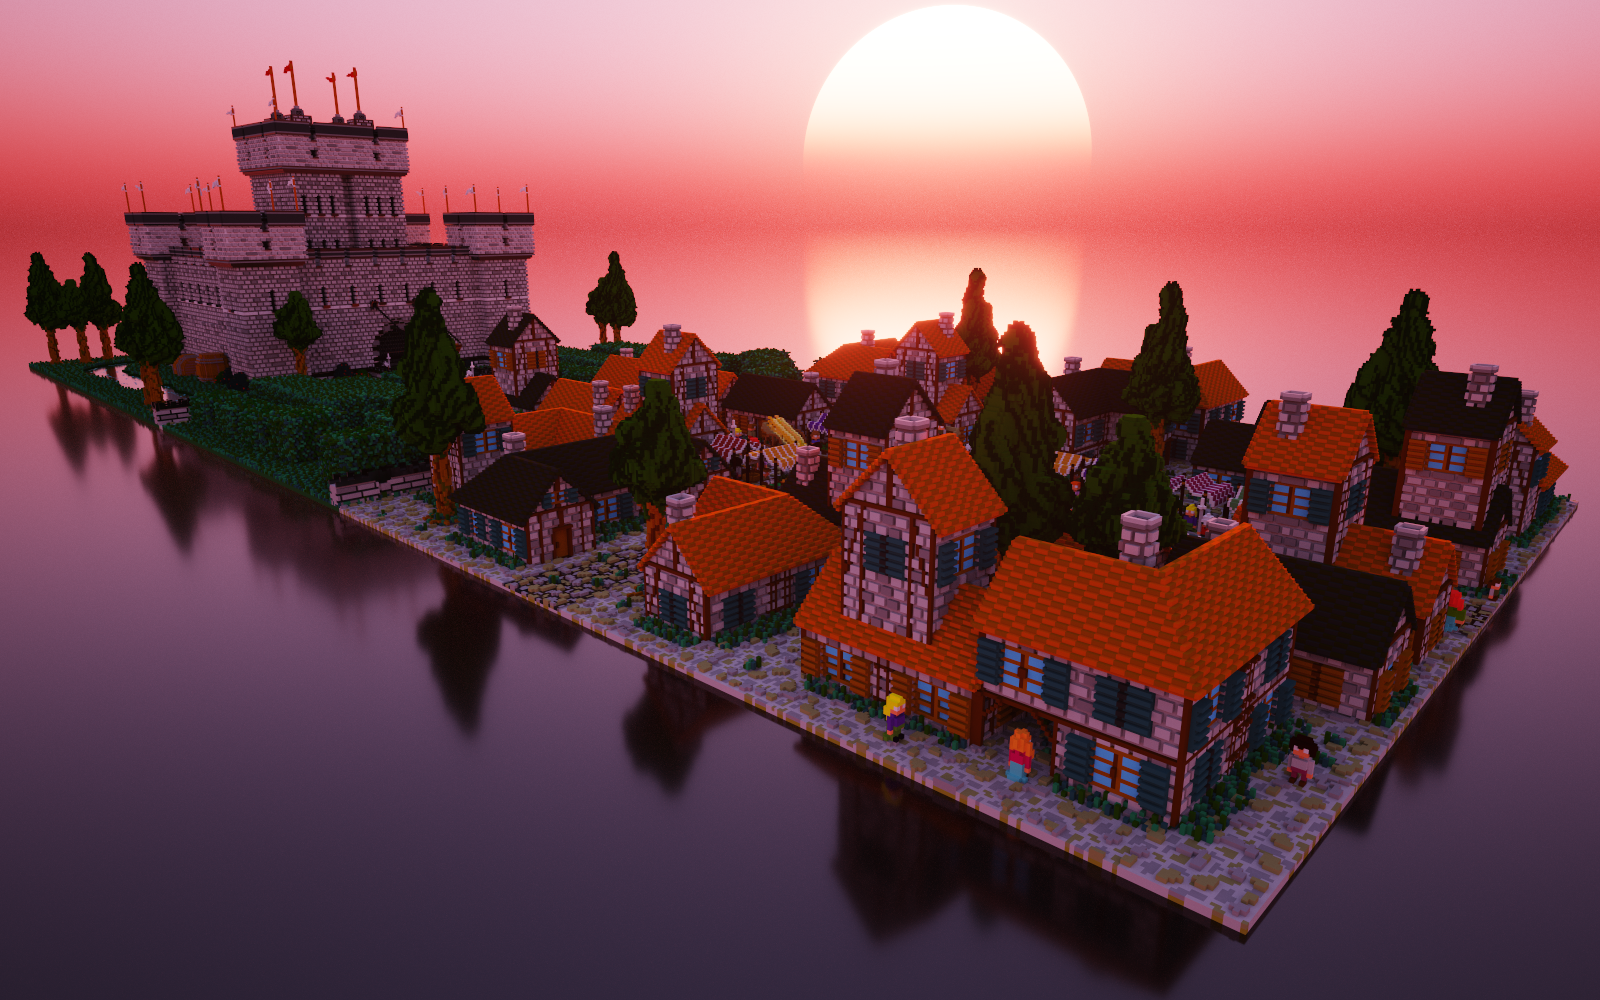
Screenshots from MagicaVoxel by Ephtracy. All renders use the built-in path tracing engine.
Download MagicaVoxel
Grab the latest build of MagicaVoxel for your platform. The download is a small ZIP archive with no installer required — just extract and run.
The newest MagicaVoxel build with animation support, updated brush tools, and an improved renderer. This is a portable app: unzip the folder to any location and double-click MagicaVoxel.exe to start.
v0.99.7.2 · 3.6 MB · Windows 64-bit View All Windows Releases
The last macOS release from Ephtracy. Works on Intel Macs running macOS Sierra and later. Two builds are provided: one for macOS 10.15 (Catalina+) and one for older systems (10.7 through Mojave). Pick the one that matches your OS version.
Download for macOSv0.99.6.2 · Catalina (10.15+)
C:MagicaVoxel or your Desktop), then run the executable directly. There is no installer to deal with and no registry entries. To remove MagicaVoxel, simply delete the folder. Your voxel projects are saved wherever you choose, so they stay safe even if you move the app.
New to voxel art? Head over to our Getting Started guide to set things up.
Frequently Asked Questions
Answers to the most common questions about downloading, installing, and using MagicaVoxel for voxel art and 3D rendering.
Is MagicaVoxel safe to download?
Yes, MagicaVoxel is safe. The software has been downloaded by hundreds of thousands of voxel artists since its first public release in 2015, and the ZIP archive from the official source at ephtracy.github.io contains no bundled adware, toolbars, or unwanted installers. The download is a simple ZIP file – around 15 MB for the Windows build – that you extract and run directly.
MagicaVoxel is developed by a solo developer known as Ephtracy, who distributes the software through a GitHub Pages site. The ZIP is clean when scanned with Windows Defender, Malwarebytes, and VirusTotal. Because the application is portable (no system-level installer), it does not modify your registry or install background services. Some users on r/MagicaVoxel have noted that Windows SmartScreen may show a warning on first launch since the executable is not code-signed with an EV certificate – this is normal for free indie software and can be bypassed by clicking “More info” then “Run anyway.”
Common mistakes to avoid:
- Downloading from third-party sites that bundle the ZIP with their own installer wrappers – always get it from the official source
- Confusing SmartScreen warnings with actual malware detection – the warning is about the lack of a paid code-signing certificate, not a security threat
- Running outdated versions from random mirrors when the current release (0.99.7.2, December 2025) is freely available
Pro tip: Bookmark ephtracy.github.io directly so you always land on the official download. If you see a site asking you to pay for MagicaVoxel or run an .exe installer, close it immediately.
For step-by-step download instructions, check our Getting Started guide.
Where is the official safe download for MagicaVoxel?
The official download source for MagicaVoxel is the developer’s GitHub Pages site at ephtracy.github.io. This is the only place Ephtracy publishes new builds. There is no other authorized distributor.
The GitHub releases page at github.com/ephtracy/ephtracy.github.io/releases also hosts older versions, including the last stable macOS build (0.99.6.2 from September 2020). The Windows build of version 0.99.7.2 weighs about 15 MB as a ZIP and requires no installation – just extract and open MagicaVoxel.exe. You can also download MagicaVoxel from our download section, which links directly to the official files.
Sites to avoid:
- Any domain that wraps MagicaVoxel in a custom installer or asks you to create an account before downloading
- Torrent links or “cracked” versions – MagicaVoxel is already free, so there is nothing to crack
- Older forks or fan-made builds that may contain outdated OpenGL libraries
Pro tip: If you want to verify file integrity, compare the ZIP file size against what’s listed on the official site. The Windows 0.99.7.2 build should be approximately 15 MB compressed.
See our Download section for direct links to the latest official builds.
Does MagicaVoxel work on Windows 11?
Yes, MagicaVoxel runs on Windows 11 without issues. The latest version (0.99.7.2) works on any 64-bit Windows system from Windows 7 through Windows 11, as long as your GPU supports OpenGL 3.3 or higher. Most GPUs manufactured after 2010 meet this requirement, including integrated Intel HD 4000 and newer.
MagicaVoxel uses GPU-accelerated rendering, so the graphics card matters more than the CPU for this software. The minimum requirements are modest: 4 GB RAM, about 100 MB of disk space, and a GPU with OpenGL 3.3+ support. For comfortable use with larger scenes and path tracing renders, 8 GB RAM and a dedicated GPU (even an older GTX 750 or RX 560) will make a noticeable difference in render times.
If MagicaVoxel shows a black screen or crashes on launch under Windows 11:
- Update your GPU drivers – go to NVIDIA, AMD, or Intel’s driver page and install the latest version for your card
- Right-click MagicaVoxel.exe, go to Properties, Compatibility tab, and try running in Windows 10 compatibility mode
- Check that your system is actually running 64-bit Windows – MagicaVoxel has no 32-bit build
Pro tip: If you have both integrated and dedicated GPUs (common on laptops), right-click MagicaVoxel.exe and select “Run with graphics processor” to force it onto the dedicated GPU. This prevents the black-screen issue some laptop users report.
Full hardware details are listed in our System Requirements section.
Can MagicaVoxel run on macOS?
MagicaVoxel does run on macOS, but the Mac version lags behind the Windows release. The latest Mac build is version 0.99.6.2, released in September 2020, while the Windows version has progressed to 0.99.7.2 (December 2025). This means Mac users miss out on newer features like the animation system and recent rendering improvements.
The macOS build requires macOS 10.12 (Sierra) or later and works on both Intel Macs and Apple Silicon (M1/M2/M3/M4) through Rosetta 2 translation. The download is available from the GitHub releases page as a ZIP containing MagicaVoxel-mac.app. File size is similar to Windows – around 15-20 MB compressed.
Known limitations on Mac:
- No native Apple Silicon build – runs through Rosetta 2, which adds a small performance overhead
- macOS Gatekeeper may block the app on first launch since it is not notarized with Apple. Fix: go to System Preferences > Security & Privacy > click “Open Anyway”
- Some users on newer macOS versions (Ventura, Sonoma, Sequoia) report needing to extract the .app, move it out of the folder, then move it back in to clear quarantine attributes
Pro tip: To remove the macOS quarantine flag manually, open Terminal and run: xattr -cr /path/to/MagicaVoxel-mac.app – this clears the extended attributes that trigger Gatekeeper warnings.
If you need a cross-platform voxel editor with a more recent Mac build, see the Features section for how MagicaVoxel compares to alternatives like Goxel.
What are the minimum system requirements for MagicaVoxel?
MagicaVoxel requires very little hardware. The minimum is a 64-bit OS (Windows 7+ or macOS 10.12+), a GPU that supports OpenGL 3.3, 4 GB of RAM, and roughly 100 MB of free disk space. That is it – the application runs well on modest hardware that most computers from the past decade can handle.
For a better experience – especially if you plan to use the built-in path tracing renderer on larger scenes – 8 GB RAM and a dedicated GPU with at least 2 GB VRAM is worth having. The renderer is GPU-accelerated, so a mid-range card like an NVIDIA GTX 1060 or AMD RX 580 will cut render times by a significant margin compared to integrated graphics. CPU speed matters less than GPU capability for this tool.
Recommended specs for serious use:
- Windows 10/11 64-bit or macOS 12+
- 8 GB RAM (16 GB if you work with multi-object world scenes)
- NVIDIA GTX 1060 or AMD RX 580 or better
- SSD for faster file loading (helpful with large .vox files)
One thing to note: MagicaVoxel’s canvas is capped at 256x256x256 voxels per object (126x126x126 in older versions). This means even lower-end machines can handle the modeling side comfortably. The GPU load only increases significantly when you start path tracing renders at higher sample counts.
Pro tip: If your renders are slow, lower the SPP (samples per pixel) setting during preview and only crank it up for final renders. You can also edit config.txt in the MagicaVoxel folder to raise dense_buffer and sparse_buffer to 1024 for better stability with complex scenes.
See the full breakdown in our System Requirements table.
Is MagicaVoxel completely free to use?
Yes, MagicaVoxel is 100% free with no paid tiers, no premium features behind a paywall, and no subscription. You get the full editor, the path tracing renderer, all export formats, the animation tools, and the world editor at zero cost. This applies to both personal and commercial use.
There is no “Pro” version or license key system. The developer Ephtracy has kept MagicaVoxel free since its initial release. You can use models you create in MagicaVoxel in commercial games, freelance work, YouTube content, prints for sale, or any other purpose without paying royalties or requesting permission. The developer appreciates credit but does not require it.
How this compares to competing voxel editors:
- Qubicle charges $99 for an indie license and $199 for professional use on Steam
- Goxel is also free on desktop, but the iOS/Android mobile app costs $4.99
- VoxEdit is free but ties into The Sandbox ecosystem with its own marketplace limitations
- Voxel Max requires a purchase on the Mac App Store
MagicaVoxel has no in-app purchases, no ads, no telemetry, and no account creation. You download the ZIP, extract it, and start creating. The software does not phone home or require internet access to function.
Pro tip: If you want to support the developer, follow @ephtracy on Twitter/X and share your MagicaVoxel creations with the community. Some artists also credit Ephtracy in their game credits or portfolio pages as a goodwill gesture.
Grab the latest version from our Download section.
Can I use MagicaVoxel models in commercial projects?
Yes, you can use any model you create in MagicaVoxel for commercial purposes. There are no licensing restrictions on your output. Anything you build – characters, environments, props, animations – belongs to you and can be sold, published, or distributed however you choose.
This is one of the reasons MagicaVoxel has become popular among indie game developers and freelance 3D artists. Games like many indie titles on Steam and itch.io use voxel assets made in MagicaVoxel, and the developers owe no royalties. The same applies to selling asset packs on marketplaces like Gumroad, using renders in print-on-demand products, or posting content on YouTube for ad revenue.
MagicaVoxel exports to several formats that work with game engines and 3D pipelines:
- OBJ – widely supported in Blender, Unity, Unreal Engine, and most 3D software
- PLY – polygon format used in point cloud and mesh processing workflows
- XRAW – raw voxel data for custom import pipelines
- VOX – native format, supported by some game engines directly
Pro tip: When exporting OBJ from MagicaVoxel for use in Unity or Unreal, the mesh will have one face per visible voxel face. For better game performance, run the exported mesh through a decimation pass in Blender using the “Decimate” modifier to reduce polygon count while keeping the blocky look.
Learn more about MagicaVoxel’s export tools in our Features section.
How do I download and install MagicaVoxel?
MagicaVoxel does not have a traditional installer. You download a ZIP file, extract it to any folder, and run the executable. The entire process takes about two minutes on a normal internet connection.
The download is approximately 15 MB for the Windows version (0.99.7.2). Since MagicaVoxel is a portable application, it does not write to your Windows registry or install system services. You can run it from a USB drive, a cloud-synced folder, or any directory you choose.
- Visit the official site at ephtracy.github.io or use our Download section
- Click the download link for your operating system (Windows or macOS)
- Save the ZIP file to your computer
- Right-click the ZIP and select “Extract All” (Windows) or double-click to extract (macOS)
- Open the extracted folder and double-click MagicaVoxel.exe (Windows) or MagicaVoxel-mac.app (macOS)
- If Windows SmartScreen warns you, click “More info” then “Run anyway”
There is no setup wizard, no EULA to accept, no account to create, and no activation key. The program opens directly to the voxel editor with a sample model loaded. The extracted folder contains the executable, config files, sample models in the “vox” subfolder, and shader files in the “shader” subfolder.
Pro tip: Create a shortcut to MagicaVoxel.exe on your desktop or pin it to the taskbar. Since the app is portable, Windows will not add it to your Start menu automatically.
For a detailed walkthrough with first-launch configuration, see the Getting Started guide.
Is MagicaVoxel portable or does it need an installer?
MagicaVoxel is entirely portable. There is no installer. You extract the ZIP and run it from wherever you placed it – your Desktop, Documents folder, an external drive, or a Dropbox directory. Nothing gets written to Program Files or the Windows registry.
This portable design has several practical advantages. You can carry MagicaVoxel on a USB stick and use it on different computers without installing anything. Your settings, palettes, and recent files are stored inside the MagicaVoxel folder itself (in config.txt and the palette directory), so everything travels with the application. You can also run multiple versions side by side by extracting them into separate folders – useful if you want to test a beta release alongside a stable version.
Folder structure after extraction:
MagicaVoxel.exe– the main applicationconfig.txt– settings file you can edit for buffer sizes and UI preferences/vox/– sample voxel models and your saved files/shader/– GLSL shaders for procedural editing/palette/– color palette files (.png format)/export/– where rendered images are saved
To “uninstall” MagicaVoxel, you just delete the folder. Nothing remains on your system. This makes it one of the cleanest software installs you will find.
Pro tip: Back up your entire MagicaVoxel folder periodically. Since all settings, palettes, and project files live inside it, a single folder backup captures everything.
Download the portable ZIP from our Download section.
How to fix MagicaVoxel not opening or showing a black screen?
A black screen on launch almost always means MagicaVoxel cannot initialize OpenGL 3.3 on your GPU. This happens most often with outdated drivers, integrated graphics that lack proper OpenGL support, or on macOS where Gatekeeper is blocking the app.
On Windows, the number one fix is updating your GPU drivers. Go to nvidia.com/drivers (NVIDIA), amd.com/support (AMD), or intel.com/content/www/us/en/download (Intel) and install the latest driver for your card. After installing, restart your PC before launching MagicaVoxel again. If the problem persists on a laptop with dual GPUs, right-click MagicaVoxel.exe, select “Run with graphics processor,” and choose the dedicated NVIDIA or AMD card instead of the Intel integrated GPU.
Other fixes that work in specific situations:
- Delete config.txt in the MagicaVoxel folder – this resets all settings to defaults and can fix corrupted configuration
- On macOS: extract the ZIP again, move MagicaVoxel-mac.app out of the folder, then move it back in. Alternatively, run
xattr -cron the .app file in Terminal - Try running MagicaVoxel as administrator (right-click > Run as administrator) – some systems with restrictive folder permissions need this
- If you extracted the ZIP to a path with special characters or very long folder names, move it to a simpler path like C:MagicaVoxel
Pro tip: Check if your GPU supports OpenGL 3.3 using the free tool GPU-Z from techpowerup.com. If the “OpenGL” field shows 3.2 or lower, MagicaVoxel will not work on that hardware.
For GPU and RAM requirements, see our System Requirements section.
Why is MagicaVoxel rendering slow and how can I speed it up?
Slow rendering in MagicaVoxel is usually caused by high SPP (samples per pixel) settings, large scene complexity, or running the renderer on integrated graphics rather than a dedicated GPU. The path tracing renderer is GPU-bound, so the single biggest improvement comes from using a better graphics card.
MagicaVoxel’s path tracing renderer works by shooting rays from the camera through each pixel and bouncing them around the scene. Higher SPP values produce cleaner, less noisy images but take proportionally longer. The default SPP is fine for previewing, but cranking it to 1000+ for final renders on a weak GPU can take minutes per frame.
Steps to speed up rendering:
- Lower SPP during preview work – use 10-50 SPP to check composition and lighting, then raise it for the final render only
- Reduce render resolution – the default viewport resolution is fine for most work. Use Photomode for high-res output only when needed
- Enable Sparse Volume in the render panel’s left sidebar – this optimizes how the renderer handles empty space in your scene
- Delete hidden interior voxels that the camera will never see. Use the Shell tool (right-click menu) to hollow out solid objects
- Edit config.txt and increase dense_buffer and sparse_buffer values to 1024 – this prevents scene corruption on complex models
For context, a mid-range GPU like a GTX 1660 can render a typical scene at 2K resolution with 500 SPP in about 15-30 seconds. An integrated Intel UHD 630 might take 3-5 minutes for the same output. If you have both integrated and dedicated graphics, make sure MagicaVoxel is actually using the dedicated card through your GPU driver settings panel.
Pro tip: For final high-resolution renders (4K or higher), consider using the denoise plugin available in the MagicaVoxel community. It lets you render at lower SPP and apply AI denoising to clean up the noise, cutting render time dramatically.
Learn more about the renderer in our Features section.
MagicaVoxel brush only works on the bottom layer – how to fix?
This is one of the most common beginner issues. When the brush only places voxels on the ground plane, it usually means you have the BG (background plane) mode enabled or the model matrix size is too small. Both are easy fixes.
The BG toggle sits in the bottom-left panel of the editor. When BG is active, MagicaVoxel constrains voxel placement to the ground plane for floor/terrain work. Click the BG button to deactivate it, and you should be able to place voxels freely in 3D space again. The other common cause is a tiny matrix size – check the numbers in the top-right corner of the editor (they control the XYZ dimensions of your canvas). If these are set to something like 10x10x1 or 40x40x40, your workspace might feel extremely limited.
Quick fixes:
- Toggle off BG in the bottom-left panel – this is the most common culprit
- Increase your matrix size to at least 40x40x40 (or up to 256x256x256) using the dimension fields in the top-right
- Make sure you are clicking on existing voxel faces, not empty space – the Attach brush needs a surface to build on
- Press Tab to switch to World Editor mode if you need to work with multiple separate objects in a scene
The default matrix size on a fresh install is 40x40x40, which is enough for small objects. For larger builds like buildings or landscapes, you will want to increase this. The maximum per-object size is 256x256x256 voxels in version 0.99.7.x (older versions cap at 126x126x126).
Pro tip: If you need a build larger than 256 voxels in any direction, switch to World Editor mode (Tab key) and arrange multiple matrices together. Each matrix can be up to 256 cubed, and the World Editor lets you position them freely in a shared scene.
See our Getting Started guide for a full walkthrough of the editor interface.
How do I update MagicaVoxel to the latest version?
MagicaVoxel has no built-in auto-updater. To update, you download the new version’s ZIP from ephtracy.github.io and extract it alongside or over your existing installation. The process takes about a minute.
Since MagicaVoxel is portable, updating is straightforward: download the latest ZIP (currently 0.99.7.2 for Windows, released December 2025), extract it to a new folder, and copy your custom palettes, shaders, and .vox project files from the old folder into the new one. The key files to migrate are your palette folder contents, any custom shaders in the shader folder, and your saved .vox files from the vox folder.
- Download the latest version from ephtracy.github.io or our Download section
- Extract the new ZIP to a new folder (e.g., MagicaVoxel-0.99.7.2)
- Copy your /palette/ folder from the old version into the new one
- Copy any custom files from /shader/ if you modified or added shaders
- Move or copy your .vox project files (they are forward-compatible between versions)
- Launch the new version and verify your palettes and settings carried over
Your .vox files are forward-compatible – older files open fine in newer versions. Going backward (opening a 0.99.7 file in 0.99.6) may not work if the file uses features added in the newer version, like animation data. Keep your old version folder around until you confirm everything loads correctly in the new one.
Pro tip: Follow @ephtracy on Twitter/X to get notified about new releases. The developer does not have a mailing list or RSS feed, so social media is the primary announcement channel.
Check what version you currently have by looking at the title bar when MagicaVoxel is open. Compare against our Download section to see if a newer release exists.
What is new in MagicaVoxel version 0.99.7?
Version 0.99.7 (and its sub-releases up to 0.99.7.2) brought animation support as the headline feature. You can now create frame-by-frame voxel animations directly in the editor, which was previously impossible without using external tools or workarounds.
Beyond animation, the 0.99.7 branch introduced an expanded maximum model size (256x256x256 per object, up from 126x126x126 in 0.99.6), improved material support including cloud and volume materials for atmospheric effects, and rendering performance improvements that make path tracing noticeably faster on modern GPUs. The UI received refinements too, with better workspace management when switching between Model Editor, World Editor, and Render modes.
Key additions in 0.99.7.x:
- Animation timeline and keyframe editing for creating voxel animations
- Increased canvas size from 126 to 256 voxels per axis per object
- Cloud and volume material types for atmospheric rendering
- Improved path tracing performance and image quality
- Better shader support with new built-in procedural shaders
- UI refinements and workflow improvements
One limitation to be aware of: version 0.99.7.x is currently Windows-only. The last macOS build remains at 0.99.6.2 (September 2020). Mac users who need animation support will need to use Boot Camp, Parallels, or a Windows PC.
Pro tip: The animation feature saves each frame as a separate layer in the .vox file. You can export individual frames as OBJ models and assemble them in a game engine for sprite-sheet style voxel animations.
Download the latest version from our Download section.
MagicaVoxel vs Goxel vs Qubicle – which voxel editor should I choose?
MagicaVoxel is the best choice for most people starting with voxel art, thanks to its free price, polished interface, and built-in path tracing renderer. Goxel works better if you need Linux or mobile support. Qubicle is aimed at professional game developers who need large canvas sizes and direct game engine exports.
MagicaVoxel offers the most visually impressive rendering of the three. Its GPU-accelerated path tracer produces photorealistic output with realistic lighting, glass, metal, and emission materials – features that neither Goxel nor Qubicle match. The trade-off is a smaller maximum canvas (256 cubed per object) compared to Goxel’s unlimited scene size and Qubicle’s 1024x512x1024 limit.
Here is how they compare on the points that matter most:
- Price: MagicaVoxel and Goxel (desktop) are free. Qubicle costs $99 for an indie license on Steam.
- Platforms: MagicaVoxel runs on Windows and macOS. Goxel adds Linux, iOS, and Android. Qubicle covers Windows and macOS.
- Rendering: MagicaVoxel has the best built-in renderer by a wide margin. Goxel offers marching cubes and basic ray tracing. Qubicle’s rendering is functional but basic.
- Canvas size: Qubicle wins for raw size. Goxel has no limit. MagicaVoxel caps at 256 cubed per object (use World Editor for larger scenes).
- Game dev workflow: Qubicle has the best game-engine export pipeline (FBX, DAE). MagicaVoxel exports OBJ/PLY. Goxel exports OBJ and glTF.
- Community: MagicaVoxel has the largest community (r/MagicaVoxel, YouTube tutorials, fan wiki). Qubicle is established in the game dev world. Goxel has a smaller user base.
Pro tip: Many voxel artists use MagicaVoxel for modeling and rendering, then export to Blender for final compositing or game-ready mesh optimization. This gives you the best of both worlds – MagicaVoxel’s fast voxel workflow plus Blender’s full 3D pipeline.
See what makes MagicaVoxel stand out in our Features section.
How do I export models from MagicaVoxel to Blender or game engines?
MagicaVoxel exports to OBJ, PLY, XRAW, and its native VOX format. For Blender and most game engines like Unity and Unreal, OBJ is the most widely supported option. The export takes a few seconds and produces a mesh file plus a material/texture file.
To export from MagicaVoxel, switch to Render mode (the camera icon in the top toolbar), then click the export button in the bottom-right panel. Select your format – OBJ for most use cases. The exported .obj file will be saved to the /export/ subfolder inside your MagicaVoxel directory, along with a .mtl material file and a .png palette texture.
- Open your model in MagicaVoxel and switch to Render mode
- Click the export icon (folder with arrow) in the bottom panel
- Choose OBJ format for Blender/Unity/Unreal compatibility
- Find the exported files in the /export/ folder
- In Blender: File > Import > Wavefront (.obj) and select the file. The colors import automatically from the .mtl file
- In Unity: drag the .obj file into your Assets folder. Unity imports the mesh and material automatically
The exported mesh has one quad per visible voxel face, which can result in high polygon counts. A 64x64x64 model might export as 50,000+ polygons. For game use, run the mesh through Blender’s Decimate modifier (set to “Planar” mode with a low angle threshold) to merge coplanar faces and cut the poly count significantly without changing the visual appearance.
Pro tip: If you are targeting Unity specifically, search for “MagicaVoxel Unity importer” – there are free Unity packages that import .vox files directly with optimized mesh generation, skipping the OBJ export step entirely.
Explore all export formats in our Features section.
How do I animate in MagicaVoxel?
Animation support was added in MagicaVoxel 0.99.7 (Windows only). It works as a frame-by-frame system where each frame is a separate voxel state, similar to traditional sprite animation but in 3D. There is no bone-based rigging or tweening – you manually sculpt each frame.
To start animating, open the Model Editor and look for the animation timeline controls at the bottom of the viewport. You create keyframes by duplicating your current model state and modifying it for the next frame. The timeline lets you scrub through frames, play the animation as a preview, and adjust frame timing.
- Open or create a voxel model in the Model Editor
- Look for the frame/timeline controls at the bottom of the viewport
- Add a new frame (this duplicates your current model as the starting point)
- Modify the voxels for the new frame – move limbs, change positions, add effects
- Repeat for each frame of your animation
- Use the play button to preview the animation in the viewport
- Export individual frames as OBJ files for use in external tools
This frame-by-frame approach works well for simple animations like walking cycles, idle animations, and attack sequences – the kind of thing you see in voxel-style games. For complex character animation with dozens of frames, consider modeling key poses in MagicaVoxel and using Blender for interpolation and rigging.
The animation data is stored within the .vox file format, so a single file contains all frames. Each frame can have different voxel states but shares the same palette. This keeps file sizes manageable even with many frames.
Pro tip: Plan your animation on paper or in a simple 2D sprite sheet first. Voxel animation frame-by-frame is time-intensive, so knowing exactly which poses you need before you start saves hours of rework.
Check out what else the 0.99.7 update added in our Features section.
What are the best MagicaVoxel rendering settings for realistic output?
The path tracing renderer in MagicaVoxel produces photorealistic results when you combine the right material assignments, lighting setup, and sample count. The most impactful settings are SPP (samples per pixel), material types, and HDR environment lighting.
Start by switching to Render mode (camera icon). The left panel shows material options – assign materials to your colors by selecting a palette color and choosing its material type: diffuse (default matte), metal (reflective), glass (transparent with refraction), emission (light source), or cloud (volumetric). The combination of glass windows, metal surfaces, and emission lights on a scene creates realistic interplay between materials.
Settings for the best renders:
- SPP: Use 500-1000 for clean final renders. Higher values reduce noise but with diminishing returns past 1000. Preview at 10-50 SPP to save time
- Image-Based Lighting: Load an HDR panorama in the lighting panel. This adds realistic sky lighting and reflections. MagicaVoxel includes several built-in HDR options
- Sun settings: Adjust sun angle and intensity in the lighting panel. Low sun angles (sunrise/sunset) create dramatic shadows
- DOF (Depth of Field): Enable in render settings for tilt-shift or bokeh effects. Set focus distance to your subject
- Resolution: Use Photomode for output above 2K. Standard viewport renders are capped at screen resolution
Common rendering pitfalls: not assigning materials (everything renders as flat matte), using only ambient light with no sun or HDR (flat, boring lighting), and leaving SPP too low (visible noise in dark areas). The renderer also respects your camera angle – use the orbit controls to find a composition with interesting lighting before starting a render.
Pro tip: For the best glass and water effects, set the material to glass with an IoR (index of refraction) around 1.33 for water or 1.5 for glass. Add a slight blue or green tint to the glass color for more realistic results.
Learn about all renderer features in our Features section.
Does MagicaVoxel work offline without an internet connection?
Yes, MagicaVoxel works entirely offline. The application has no internet requirement, no login system, no cloud features, and no telemetry. Once you have the ZIP file extracted on your machine, you can use every feature – modeling, rendering, exporting, animation – without any network connection at all.
This makes MagicaVoxel well-suited for use on air-gapped machines, during travel without Wi-Fi, or in environments where internet access is restricted. The software does not check for updates automatically, does not sync files to any cloud service, and does not send usage analytics. Your .vox files, palettes, shaders, and exported renders all live locally in the MagicaVoxel folder.
The only scenarios where you would need internet are:
- Downloading the software itself (the initial ZIP from ephtracy.github.io)
- Checking for new versions manually (visiting the official site or @ephtracy on Twitter/X)
- Downloading community resources like custom palettes, shaders, or tutorial files
Even the HDR environment maps used for image-based lighting in the renderer are bundled with the application – you do not need to download them separately. The entire extracted folder is self-contained at around 50-100 MB on disk.
Pro tip: If you plan to use MagicaVoxel offline regularly, download a few extra community shader packs and palette collections while you have internet, and drop them into the /shader/ and /palette/ folders. That way you have a richer toolkit available offline.
Get started by downloading from our Download section.
Still have questions? Visit the r/MagicaVoxel community or check our Getting Started guide.